Table of Contents
Job Market Candidate Websites
This article is designed to help get you started with creating your own job market candidate webpage.
Creating a new JMC Website
Go to Google Sites and log in using your @umd.edu email address.
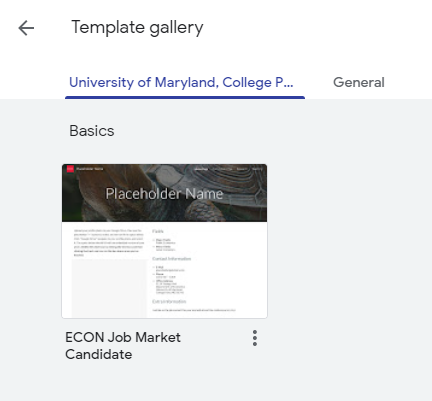
Once at the main page, click the “Template Gallery” button at the top-right of the site. In the “University of Maryland, College Park” tab, select the “ECON Job Market Candidate” template.
This will open a personal duplicate of the template for you to edit. If you need to close the window at any time, your site will be saved in your main Google Sites window in the Recent Sites section for you to resume editing later.
Editing your JMC Website
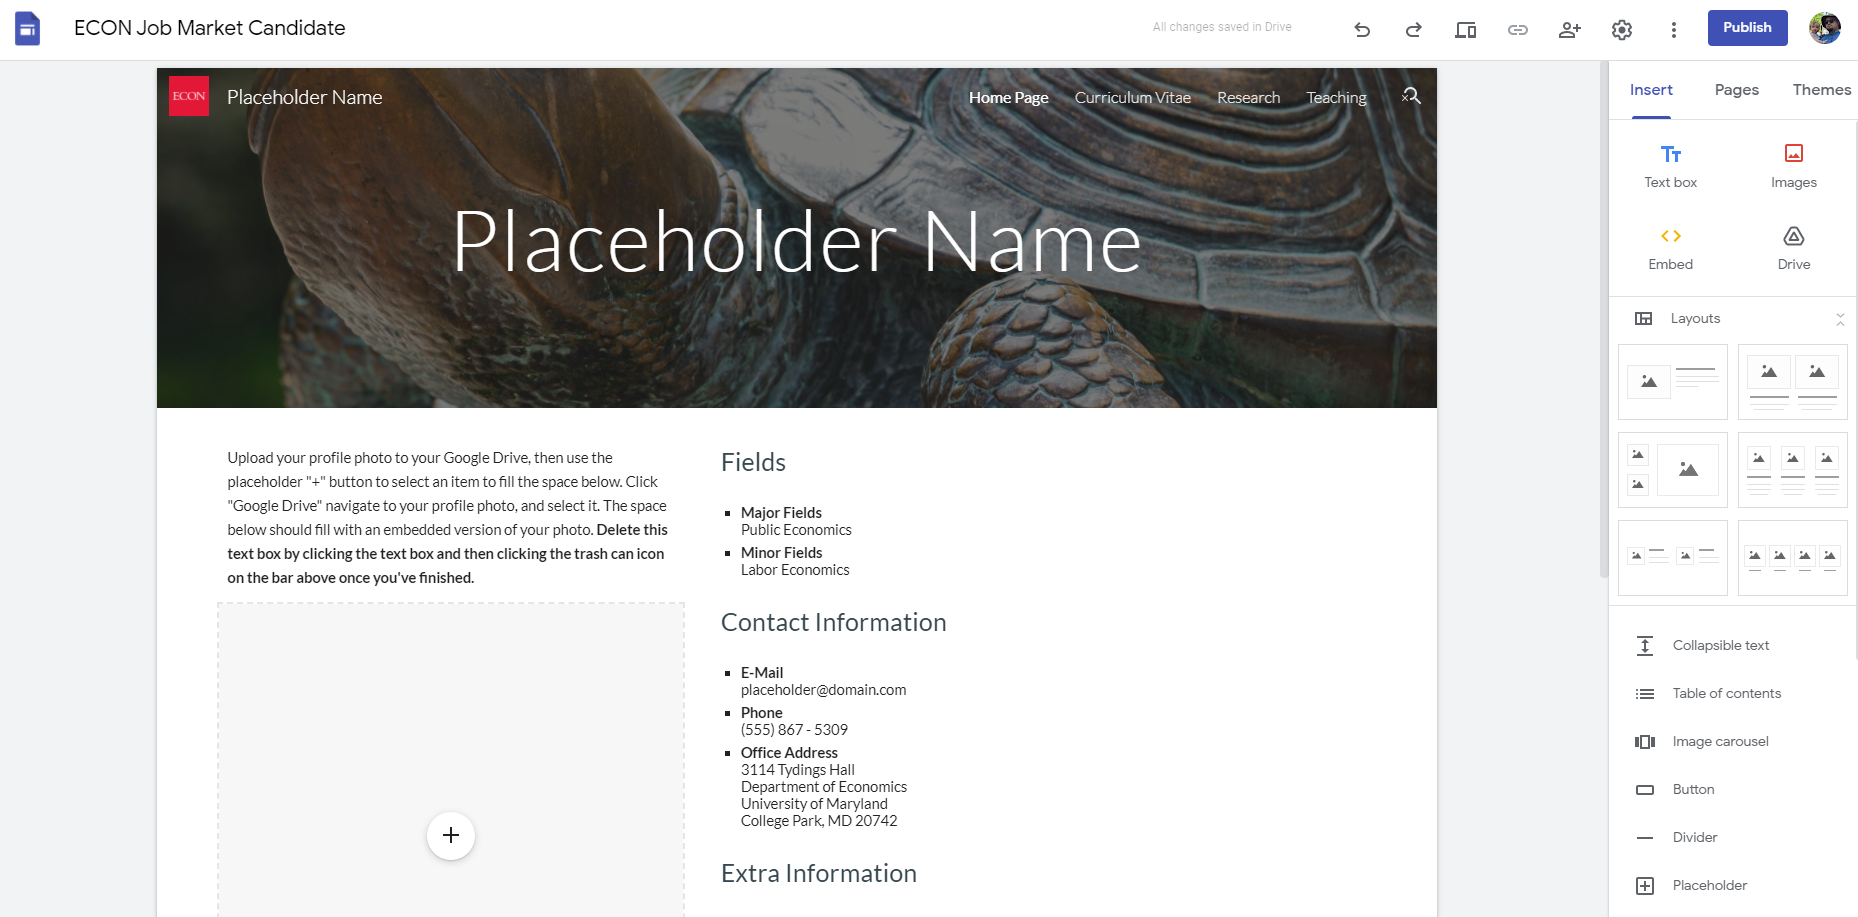
Once you've created your new site from the template, you will be taken to the main editing page for your site.
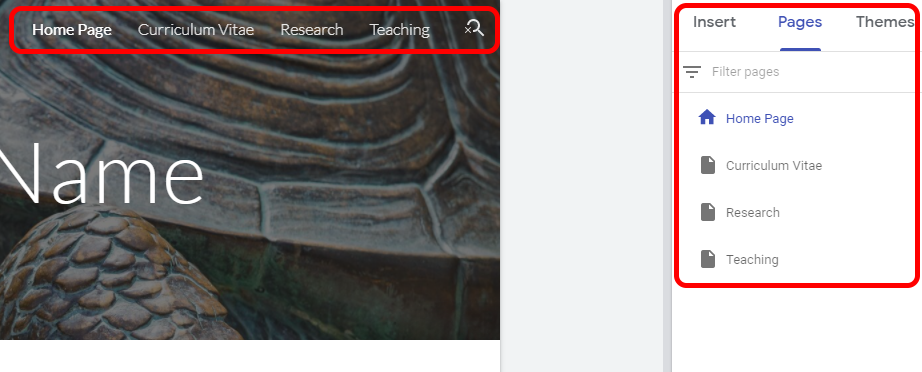
This site is divided into four sections: Home Page, Curriculum Vitae, Research, and Teaching. You can move between these pages by either clicking on their links at the top-right of your site, or selecting them from the Pages tab in the drawer on the right side of your editing window.
Before we begin editing the main page, we need to make a few edits to customize the site for your personal use.
First, click the title of the document at the top-left of the editing window. Change the name to reflect your personal information, like in the case of John Doe here. Press Enter when done to save the change.
One more thing you will need to do is to select the name at the top right of the site itself, and change it to contain your full name. This will allow viewers to see your name as they navigate between the various pages on your site. Press Enter once you are done to save your changes.
Home Page
This page will be the first thing anyone who visits your site will see. It contains your name, photo, a quick breakdown of your professional information, and your contact information. You can directly click on any of these text fields to edit their information.
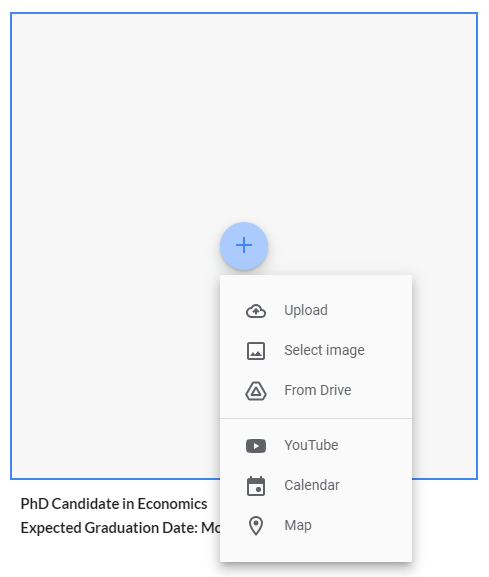
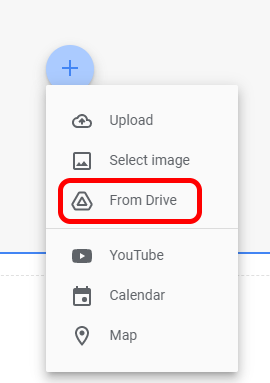
We've added a placeholder box on the left side of the page that will hold your profile photo. Click on the + in the middle of the window and select your photo by either uploading it directly, or choosing it from your Google Drive if you already have it stored there.
Beyond that, you can begin replacing the placeholder text in the various text boxes to customize the page to fit your information.
Curriculum Vitae
This page will host your CV as an embedded document for people to view right in the browser.
Before you can add your CV to this page, you will need to upload it to Google Drive first. Head to Google Drive and upload your CV to your drive.
Once you've uploaded the CV, head back to the site editing window. Click on the + in the middle of the window and select Google Drive.
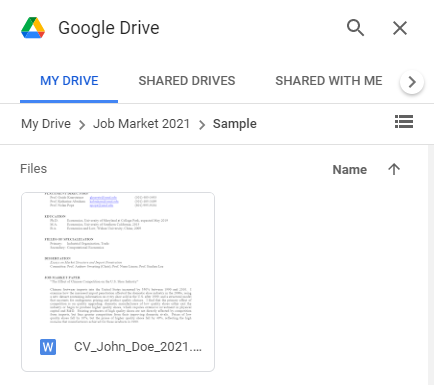
Find your CV in the Google Drive in the drawer on the right side of the editing window, and double-click it.
This will embed your CV in the page. You should now be done editing this page.
Research
This page will host various research projects and papers you've worked on throughout your career. It's pre-populated with one section in which you can edit the title of your paper or project, and the description of these items.
If you need to create more sections, hover over the section on the page and a set of buttons will appear on the left side of the page in the editing window. Click the two rectangles to copy the section to a duplicate just below it.
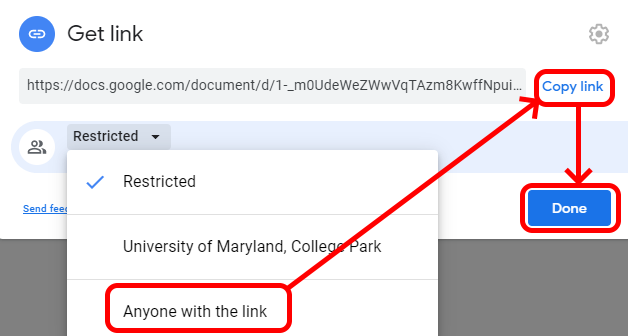
In many cases, you will want to attach a link to your actual paper. You'll first need to head to Google Drive and upload the paper into your drive. Once the file is uploaded, right-click on it and click Get link; this will open a pop-in window. In the Get link section of the pop-in, change the sharing to Anyone with the link, then click copy link to copy your shared link to the clipboard, then click Done to save your changes.
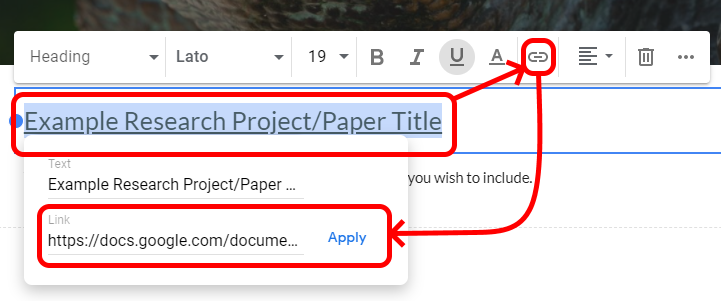
Once that is finished, head back to your site editing window. Highlight the title of your page, and then click the chain icon in the editing ribbon. Paste your copied link into the Link section, then click Apply. Your title should now be changed to be a hyperlink to your paper.
Teaching
This page will host various research projects and papers you've worked on throughout your career. It's pre-populated with one section in which you can edit the title and description of your class.
If you need to create more sections, hover over the section on the page and a set of buttons will appear on the left side of the page in the editing window. Click the two rectangles to copy the section to a duplicate just below it.
Publishing your JMC Website
When you are done personalizing your JMC webpage, you can publish it to the internet for all to see by doing the following:
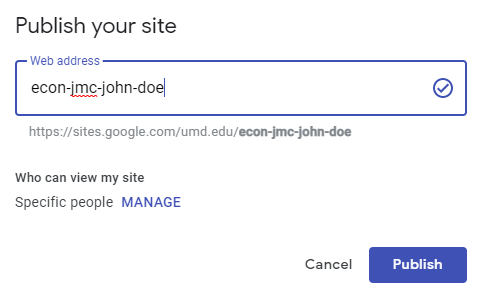
Click the Publish button at the top-right of the editing window. This will bring up the Publish your site pop-in window.
Enter your web address in the following format: econ-jmc-(first name)-(last name). You will see the full address of your personal site underneath this text field. In the example below, we're about to publish a site for John Doe's JMC profile.
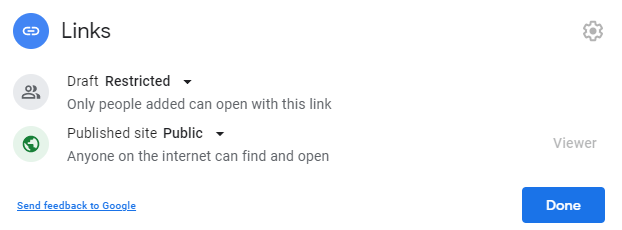
Under the Who can view my site section, click MANAGE. This will bring up the sharing pop-in window.
In the “Links” section of the sharing window, click Change. Set Draft visibility to Restricted, and Published site visibility to Public. Click Done once this settings are changed.
You are now ready to publish your page. Click the Publish button at the bottom right of the pop-in and the site will be made available to view for everyone at the link provided in the Publish window.
NOTE: If you need a copy of this link after you've published the site, you can click the chain icon near the publish button in the editing window; this will create a pop-in window where you can copy your site's link.

